
The first chilly evening after my partner and I moved into our fixer-upper, we tried to roast marshmallows over a wobbly charcoal grill. Gusts of wind sent sparks flying, the grate kept tipping, and the only thing thoroughly toasted was my patience. I remember staring at the blank patch of lawn and thinking, There has to be a better way to gather around a flame. That misadventure became the spark—pun intended—for the diy firepit project I finally tackled the following spring. Forty-eight hours, three friends, and one well-worn wheelbarrow later, we had a stone ring that’s now the social center of our backyard. I’ve since helped two neighbors and my brother replicate the process, borrowing tips from heavy-hitter DIY blogs like Young House Love, The Art of Manliness, and Bob Vila. What follows is a distilled, personal playbook combining personal trial-and-error with best-practice wisdom so you can build a sturdy, code-friendly fire pit in a single weekend.
1. Dream It, Site It, Permit It
Start with the end in mind. Picture cool-weather conversations, s’mores at kids’ birthdays, maybe even a Dutch-oven chili bubbling on the coals. Your mental use-case will steer size, shape, and seating.
-
- Choose a Safe Spot
-
- Distance: At least 10–15 feet from structures, fences, trees, or overhanging limbs (many cities mandate 25 feet—check first).
-
- Surface: Level ground is ideal; gentle slopes can be carved flat with a shovel and tamper.
-
- Wind: Face prevailing breezes so smoke blows away from the house and neighbor windows.
-
- Choose a Safe Spot
-
- Check Local Codes
A five-minute call to the planning office can save hefty fines. Some municipalities limit pit diameter, require spark screens, or ban wood fire altogether during summer. If you’re in an HOA, confirm aesthetic guidelines, too.
- Check Local Codes
-
- Call Before You Dig
Dial 811 (in the U.S.) or your country’s underground utility hotline. Lines are often shallower than you expect, and a routine DIY becomes an emergency if you rupture gas or cable.
- Call Before You Dig
2. Gather Your Gear
Below is the bill of materials for a classic, circular 36-inch-inside-diameter pit, roomy enough for six adults but compact enough for smaller yards. Adjust up or down; the method stays the same.
| Item | Qty | Notes |
|---|---|---|
| Fire-rated retaining-wall blocks (4 in H × 8 in D × 12 in L) | 48 | Choose concrete or natural stone rated for high heat |
| Gravel (¾-in “road base”) | 5 bags (0.5 cu ft) | For drainage layer |
| Paver sand | 3 bags | Beds the first course |
| High-heat construction adhesive | 2 tubes | Bonds upper courses |
| Steel fire-ring insert (optional) | 1 (36 in dia.) | Extends block life, eases cleaning |
| Metal spark screen (optional) | 1 | Often required by code |
| Tools: shovel, hand tamper, 4-ft level, rubber mallet, masonry chisel, caulk gun, tape measure, garden hose, work gloves |
Cost snapshot: In 2025 dollars, the above runs $280–$450 depending on stone style and whether you spring for the insert and screen. Renting a tamper ($20) for the weekend makes compaction much faster and neater.
3. Weekend Timeline at a Glance
| Time Block | Tasks |
|---|---|
| Friday after work (1 hr) | Shop for materials; stage blocks near site |
| Saturday morning (4 hrs) | Lay out circle, dig base, add gravel & sand, set first course |
| Saturday afternoon (2 hrs) | Dry-fit second & third courses, mark cuts, break for adhesive cure |
| Sunday morning (3 hrs) | Glue final courses, install insert, backfill gaps |
| Sunday afternoon (1 hr) | Cure adhesive, add seating stones or gravel apron, inaugural burn |
You’ll spend more active minutes on measuring and leveling than on stacking blocks, but that precision up front guarantees a pit that looks pro and lasts decades.
4. DAY 1—Dig, Level, and Set the Foundation
4.1 Mark the Circle
Wrap mason’s twine around a 15-inch-long stake; measure 18 inches of string for the inner radius (36 inch diameter) plus the block thickness (another 8 inches) if you want to spray-paint the outer edge too. Sweep the string around with inverted spray paint to leave a crisp guideline.
4.2 Excavate
Shovel 7 inches deep within the outer circle. Don’t shortcut here; blocks settle unevenly without a proper footing. Haul soil to a tarp—you’ll reuse some to backfill.
4.3 Add the Drainage Layer
Pour 4 inches of gravel, spritz lightly with water, and compact with the tamper in overlapping passes until it feels as solid as a sidewalk. Follow with a 1-inch blanket of paver sand; screed smooth using a scrap 2 × 4.
4.4 Set the First Course
Lay the first block dead-center on your paint line, then work clockwise. Tap each piece gently with a rubber mallet so the top sits perfectly level front-to-back and side-to-side. Use the 4-ft level across multiple blocks every few stones—tweak before moving on. When the circle closes, you might have a small gap; mark and cut one block with a masonry chisel (or an angle grinder with diamond blade) for a custom fit.
Personal tip: My first fire pit leaned a full inch because daylight faded and I rushed leveling. After a single rainy winter, blocks shifted, and I had to disassemble down to the base. Do it right once.
5. DAY 2—Stack Courses & Prep for Adhesive
Dry-stack the second row, staggering joints so seams don’t align vertically. Check level again. For a 36-inch interior, three courses yield an 12-inch-tall wall—enough to contain flame yet low enough for foot-rest marshmallow duty. If you want a deeper “well,” dig another inch or two in the pit center before filling with gravel.
Mark any half-block cuts now (usually one per course to maintain stagger). Better to chisel while stones are free than pry them off adhesive later. Once dry-fit looks flawless, break until morning; the overnight pause lets the base settle.
6. DAY 3—Bond, Finish, and Fire Up
6.1 Gluing Courses
Sweep dust from stone faces so adhesive bonds tight. Apply a zig-zag bead of high-heat adhesive on the top of the first-course perimeter, press second-course blocks down, and wiggle slightly to seat. Repeat for the third course. Wipe squeeze-out immediately.
Most adhesives set in 4 hours but cure fully in 24. Because you’ll burn tonight, finish gluing by late morning; heat accelerates curing once the pit’s first small fire is lit.
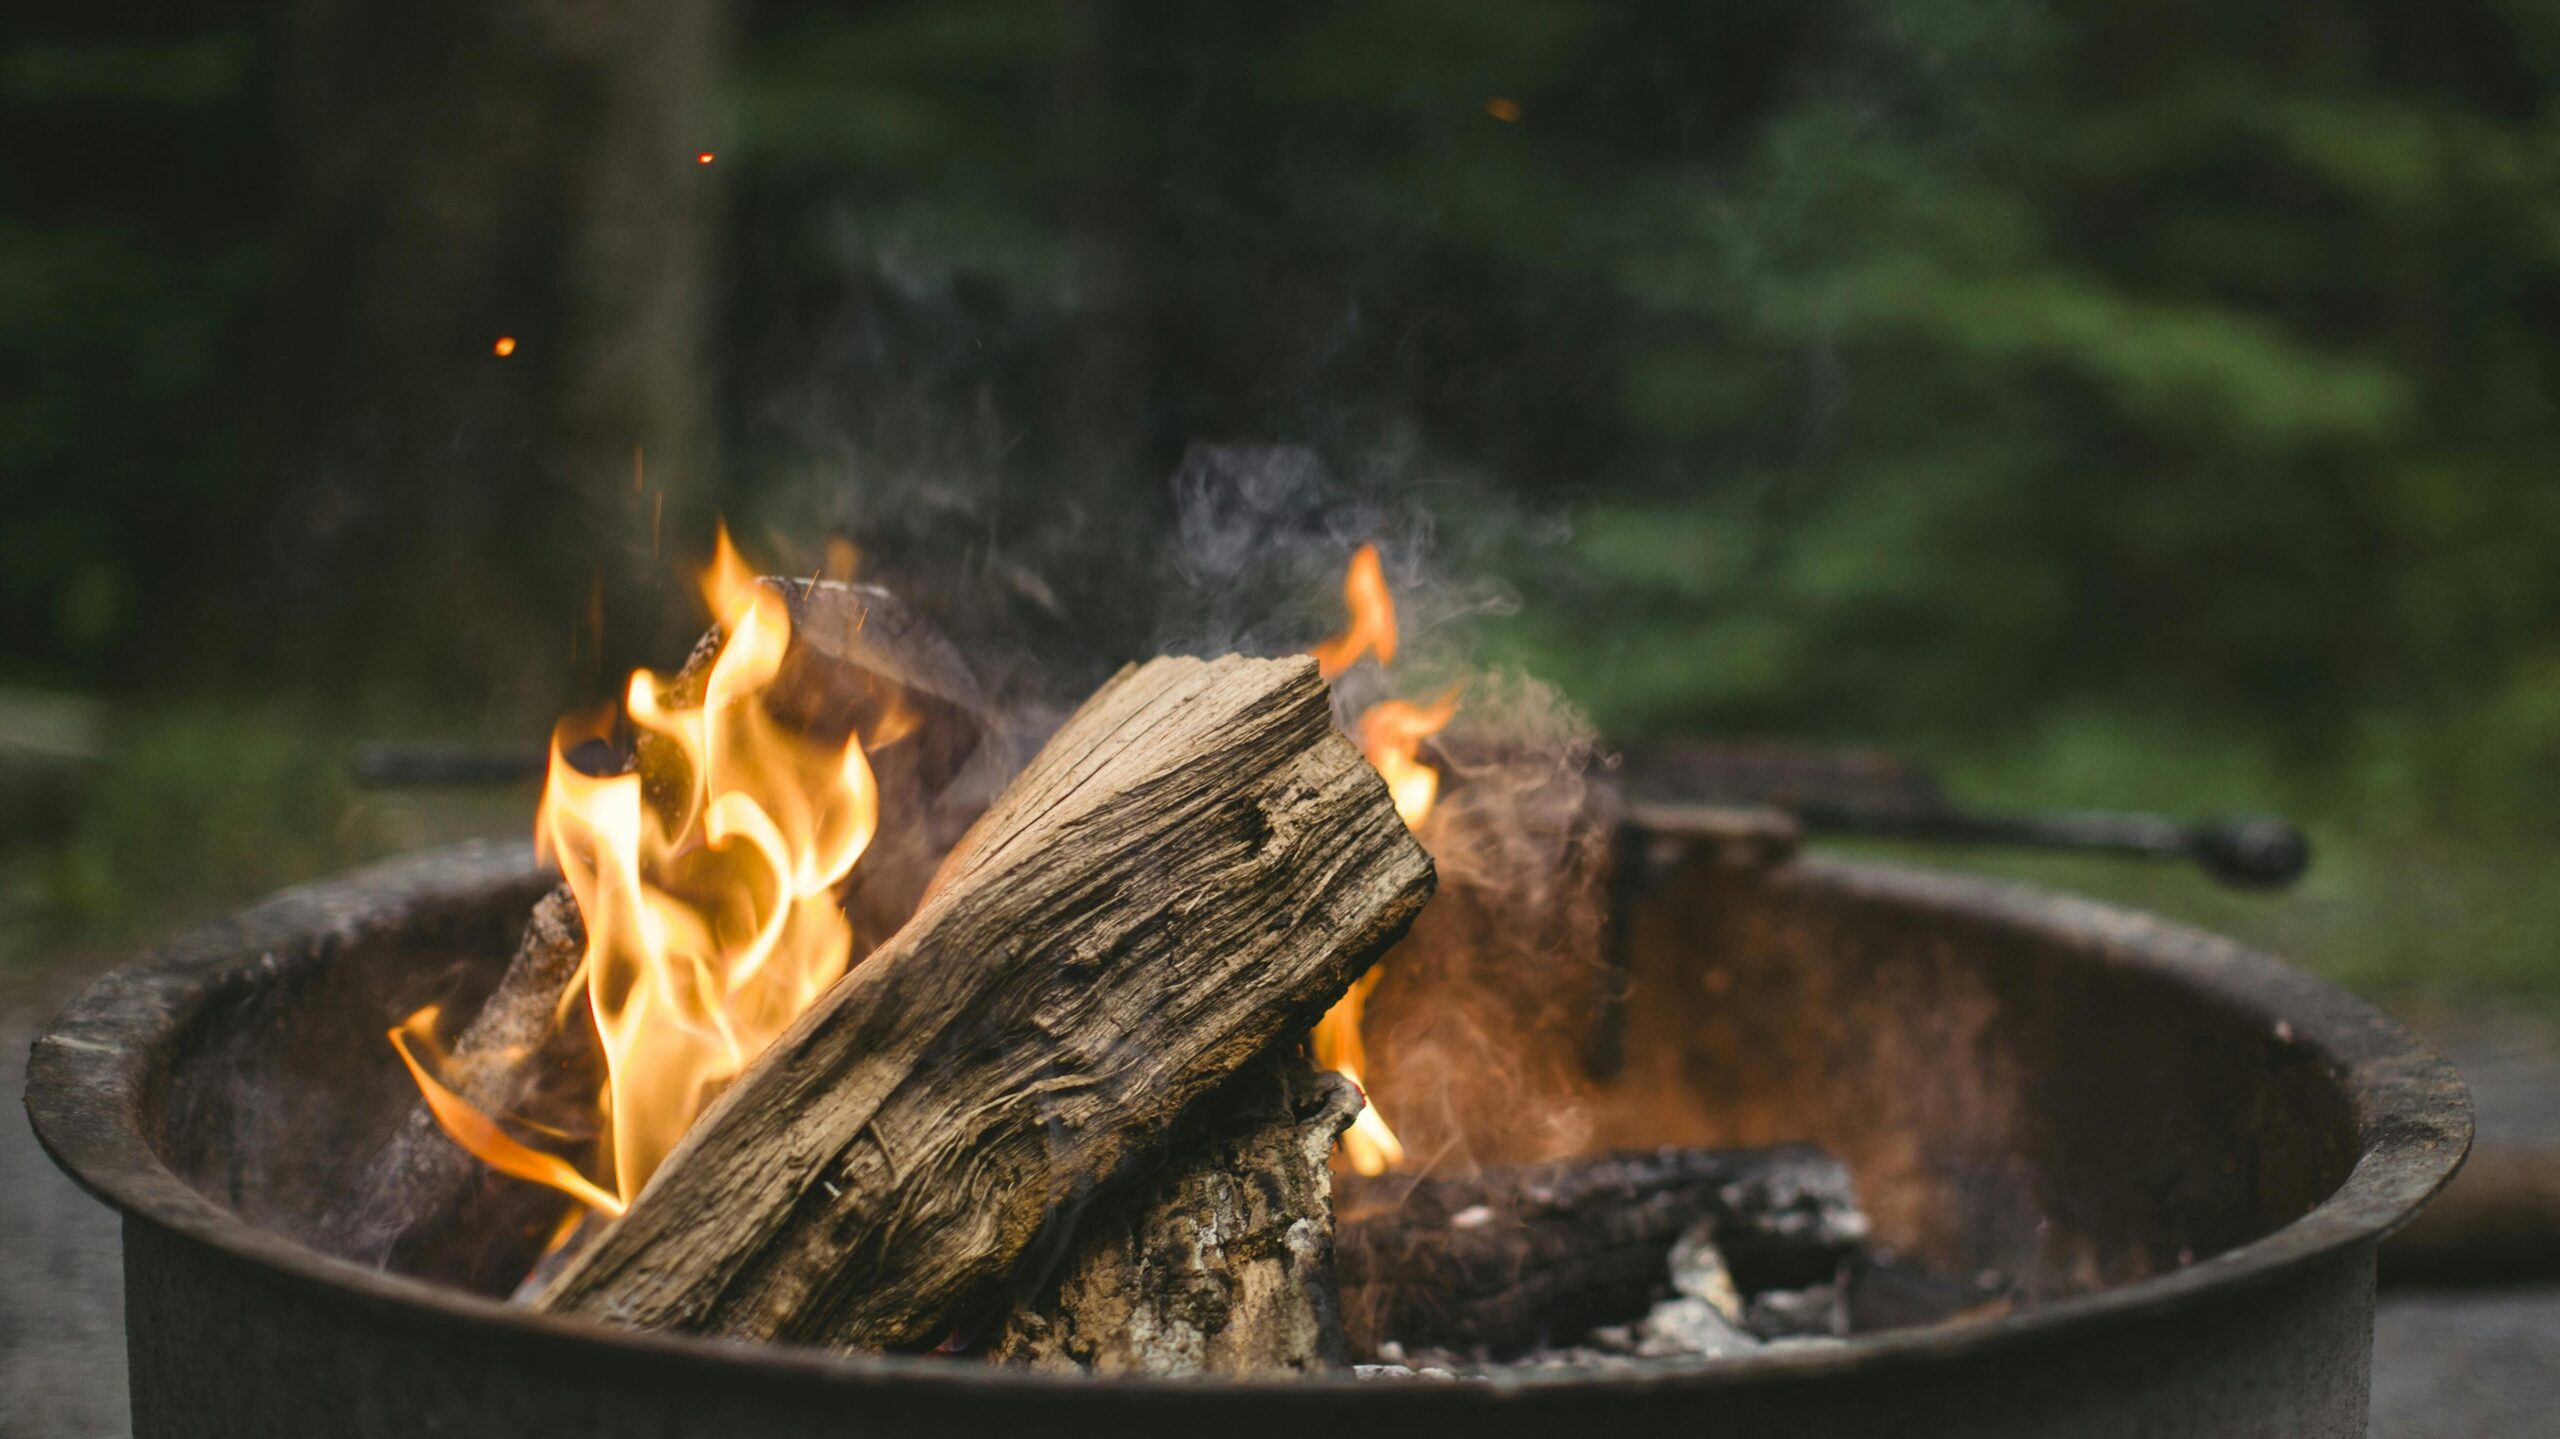
6.2 Insert the Fire Ring (Optional but Smart)
Drop the steel ring inside the block circle before adhesive cures; the snug fit centers itself. If clearance is tight, shave small sand ridges with a trowel. The ring prevents direct flame on stone, reducing cracking and simplifying ash cleanup. It also delivers a crisp, finished look borrowed from high-end landscaping blogs like Gardenista.
6.3 Backfill & Apron
Trowel leftover soil or gravel into any small gaps between outer wall and excavated edge. Then spread a 2-foot-wide “apron” of pea gravel around the pit—this sets off the feature visually and becomes a safe, non-flammable foot zone for chairs.
6.4 Seating Hacks
If budget’s tight, slice 4-inch-diameter log rounds into 18-inch stools, sand the tops, and seal with exterior poly; stack unused retaining blocks two high for instant benches; or thrift Adirondack chairs and refresh with spray paint.
7. First Burn & Safety Essentials
Light a modest starter fire: two or three small logs over kindling. Let flames season the stone and cure adhesive for 30 minutes before adding larger wood. Expect a faint chemical scent the very first time only. Keep a charged garden hose with a shut-off nozzle or a 5-gallon bucket of sand nearby—water can crack hot stone if dumped inside, but it’s perfect for grass flare-ups.
Wood rules
Burn only seasoned hardwoods. Softwoods spark excessively and deposit gummy creosote. Never burn trash, treated lumber, or glossy magazine paper—toxins galore.
Spark Screen
Codes in fire-prone regions often mandate a metal mesh cover. I resisted at first (screens felt grannyish) but finally bought one after a breezy night sent embers onto the lawn. It folds open for log addition and doubles as critter deterrent when the pit’s cooling.
Surface Temperature Awareness
Blocks may read 150–200 °F near the top course during a vigorous blaze. Warn kids and guests, and add a simple steel fire-pit poker to stir logs instead of nudging with foot or stick.
8. Maintenance & Upgrades
| Task | Frequency | Why |
|---|---|---|
| Scoop ash to metal bucket | After 3–4 burns | Better airflow, less smoke |
| Inspect adhesive seams | Seasonally | Re-glue popped blocks |
| Rake gravel apron flat | Monthly | Prevents trip edges |
| Reseal log stools | Annually | UV and rain defense |
When you crave a style upgrade, embed LED rope-lights under the apron rim for subtle evening glow, or swap gravel for pallet-wood decking cut into a hexagon around the ring (seal boards with fire-retardant stain).
9. Frequently Smoldering Questions
Q: Can I build on an existing concrete patio?
A: Yes—use a metal fire-pit bowl on heat-resistant pavers set atop the slab. Direct flame on concrete can cause spalling (explosive chipping).
Q: What if my soil is pure sand or clay?
A: For sand, compact extra gravel; for clay, dig two more inches and add doubled gravel depth to improve drainage.
Q: I want a square pit—any trick?
A: Swap retaining blocks for concrete “fire bricks.” Dry-lay the inner square, surround with larger landscape blocks, fill gaps with pea gravel.
10. Parting Flames
Two evenings after our inaugural burn, my neighbor—previously skeptical about “yet another backyard project”—joined us with a six-pack and declared, “This feels like camping without packing the car.” That’s the magic of a well-built fire pit: it extends living space, slows conversation, and lets crisp night air mingle with woodsmoke in a way no screen-streaming indoors can match.
You’ve now got the map: site wisely, dig deep, level obsessively, stack patiently, and obey safety. Follow the weekend rhythm, and by sunset on Day 2 you’ll swap scroll time for crackling logs under the stars. Grab the marshmallows—and maybe a windproof lighter this time—and enjoy the primal comfort of fire made civilized by your own two hands. Happy building, and burn bright!
Pingback: Backyard Design: The Ultimate DIY Backyard Ideas Guide