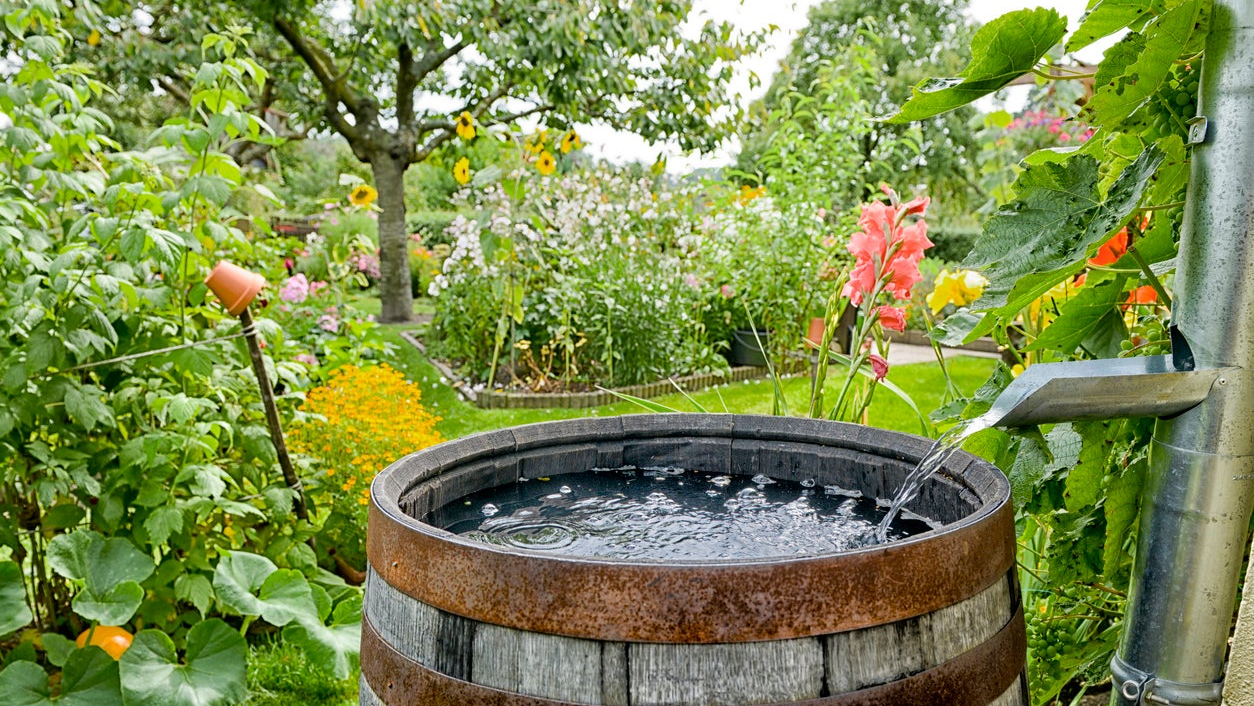
I remember the exact moment the idea took root. It was a late-July afternoon, the kind where even the tomato vines look thirsty, and I was hauling my third hose-length trip from the outdoor spigot to the raised beds. As I twisted the nozzle shut, a neighbor shouted over the fence, “Funny how we pay for watering when last night’s storm just poured gallons down the gutter.” His offhand comment nudged me into one of the most satisfying weekend projects I’ve ever tackled: installing a rain-barrel catchment system. Two barrels and a few hardware-store fittings later, my veggie patch now runs on stormwater, my utility bill is lighter, and watering has gone from chore to small, sustainable delight. Whether you garden on a postage-stamp patio or a half-acre plot, diverting roof runoff into barrels is one of the fastest, cheapest upgrades you can make.
1. Why Harvest Rainwater?
-
- Cost savings – Even at a modest $0.015 per gallon, a single 55-gallon barrel filled 20 times a season saves roughly $16. Multiply by two or three barrels—plus decades of use—and you’ve suddenly funded next year’s seed order.
-
- Plant health – Rain lacks the salts and chlorine found in treated tap water, so leafy greens and delicate seedlings thrive.
-
- Stormwater mitigation – Capturing roof runoff eases pressure on municipal drains and curbs localized flooding.
-
- Sustainability cred – In many regions, water tables are dropping. A simple barrel bank lets you do your part without sacrificing lush borders.
My own motivation was a mix of thrift and eco-guilt; watching potable water soak into mulch felt wasteful. Rain barrels transformed that frustration into an empowering habit.
2. Check Local Rules First
Before you buy a single fitting, confirm two things:
-
- Legality – Most U.S. states now allow residential rain harvesting, but a few still regulate storage volume or require sealed systems to deter mosquitoes. In Colorado, for example, homeowners are limited to two barrels totaling 110 gallons.
-
- Backflow codes – Some municipalities ask for a “first-flush diverter” that discards the dirty initial runoff or require overflow routed away from foundations.
A quick call to the planning department spared me a potential fine and pointed me to a $10 discount program on food-grade barrels. Worth the five minutes.
3. Planning Your System
A. Sizing the barrels
Rule of thumb: every inch of rain on 100 square feet of roof yields about 62 gallons. My 240 sq ft garage roof fills two 55-gallon barrels from a single one-inch downpour—plenty for weekly watering.
B. Choose location
-
- Downspout proximity – Fewer elbows and extensions mean fewer leaks.
-
- Elevation – Every foot of height adds roughly 0.43 psi of water pressure. I set mine on stacked cinder blocks, boosting both flow and bucket clearance.
-
- Ground stability – A full 55-gallon drum weighs over 450 lbs. Level, compacted ground or a paver pad prevents tilt disasters.
C. One barrel or daisy-chain?
Starting with one is fine, but linking a second or third barrel with short lengths of garden hose (via bulkhead fittings) triples capacity with minimal extra work.
4. Materials & Tools
| Item | Purpose | Notes |
|---|---|---|
| 55-gallon food-grade barrel | Water storage | Avoid barrels that held harsh chemicals. |
| ¾” spigot with nut & washer | Water outlet | Metal outlasts plastic. |
| 1″ overflow bulkhead & hose | Direct excess water | Aim hose toward garden or rain garden. |
| 2″ hole saw | Drill ports | Fits standard spigot shank. |
| Silicone caulk | Seal threads | 100 % exterior grade. |
| Downspout diverter kit | Directs water in | DIY hacks work, but prefab saves time. |
| Cinder blocks or pavers | Barrel stand | Four per barrel, stacked two high. |
| Drill & adjustable wrench | Install hardware | Cordless drill makes placement easier. |
| Screen mesh & zip ties | Debris filter | Keeps leaves and skeeters out. |
Total cost for my dual-barrel system: $112 (barrels $25 each via city program, fittings $40, blocks $22). Compare that to a fancy commercial kit at $180–$250.
5. Step-by-Step Installation
5.1 Prep the Base
-
- Clear and level a 2′ × 4′ footprint beside your downspout.
-
- Lay pavers or compacted gravel 2–3 inches deep for drainage.
-
- Stack blocks – Two courses of cinder blocks provide a 16″ lift, perfect for filling watering cans.
Personal tip: Dry-fit the barrel on the stand before drilling. Mine rocked slightly; inserting shim stones under one block solved it.
5.2 Install Barrel Hardware
-
- Mark port height – Spigot 3″ from bottom (leaves room for sediment), overflow 3″ from top.
-
- Drill spigot hole with 2″ hole saw; gently deburr edges.
-
- Feed spigot shank through hole, slide washer inside, tighten nut with wrench.
-
- Run silicone bead around exterior flange to ensure watertight seal.
-
- Repeat for overflow port; attach garden hose leading away from house.
If daisy-chaining, drill an additional 1″ port on the side facing the next barrel, install a bulkhead fitting, and connect with short reinforced hose.
5.3 Modify the Downspout
-
- Measure 8–10″ above barrel inlet.
-
- Cut downspout using tin snips or a hacksaw; smooth edges.
-
- Attach diverter per kit instructions—most slip into the cut and include a flexible fill hose.
-
- Cap unused lower section or redirect it to a splash block for winter bypass.
When the barrel fills, water backs up into the diverter and continues down the original route, preventing overflow at the gutter.
5.4 Mosquito & Debris Defense
Cut a square of fine aluminum screen slightly larger than the inlet, drape it under the barrel’s lid, and cinch with zip ties. Replace every year; clogged mesh is the top reason newbie systems overflow.
6. First Fill & Leak Check
Wait for the next rain or cheat with a hose. Fill halfway, watch fittings, and tighten any weepers. If threads drip, drain, dry, and add more silicone. Better to fuss now than discover a silent leak when plants are parched.
After my first test, a slow seep appeared at the spigot threads. A quarter-turn with the wrench plus extra sealant fixed it, and it’s been dry ever since.
7. Using Your New Water Bank
-
- Gravity flow – Great for watering cans, slow soaker hoses, or drip lines in beds below barrel height.
-
- Pump option – A small 12-volt submersible pump (~$25) pressurizes water for sprinklers. I wired mine to a solar panel, keeping the system off-grid.
-
- First-flush tip – During pollen-heavy spring weeks, I let the first gallon run out the spigot onto a driveway patch of weeds; clearer water follows.
Remember: Rain-barrel water is non-potable. Don’t drink or spritz on edible leaves you’ll eat raw. Root-zone watering is perfectly safe.
8. Seasonal Maintenance
| Season | Task | Why |
|---|---|---|
| Spring | Scrub barrel interior with 1:10 bleach solution. | Removes algae and biofilm. |
| Summer | Check mosquito screen monthly; replace if torn. | Prevent breeding. |
| Autumn | Clear gutters & diverter of leaves every two weeks. | Maintains flow. |
| Winter | In freeze zones, drain barrels & detach hoses; store upside down. | Ice expansion cracks plastic. |
Personal confession: My first winter I forgot to drain. A January cold snap ballooned ice inside, warping the spigot threads. Replacement spigot: $8—lesson learned.
9. Troubleshooting
| Symptom | Likely Cause | Fix |
|---|---|---|
| Barrel overflows at heavy rain | Diverter inlet too low or blocked screen | Raise barrel, unclog screen. |
| Slow water flow | Low elevation or kinked hose | Add blocks or straighten hose. |
| Algae growth | Sun exposure | Paint barrel dark color or wrap in reed screen. |
| Mosquito larvae present | Screen gaps or prolonged stagnation | Tighten mesh; use BT-i dunks monthly. |
10. Fun Upgrades for Year Two
-
- Link to drip irrigation – Thread a pressure-reducing timer onto the spigot and feed half-inch tubing through beds for truly hands-off watering.
-
- Add a second story – Stack another barrel vertically by setting a second stand behind the first and siphoning overflow upward via flexible tubing (water seeks its own level).
-
- Barrel beautification – Coat with exterior paint to match house trim or stencil botanical motifs. A coat of UV-resistant sealant extends life.
-
- Smart gauge – A floater-style gauge or DIY clear-tube sight glass lets you see volume at a glance.
I painted mine a muted olive, then built a cedar-slat lattice around the stand; friends now assume it came from a high-end catalog.
11. Cost & Payback Snapshot
| Item | Cost | Annual Savings* | ROI |
|---|---|---|---|
| Two barrels & stands | $112 | $30–$40 | 3–4 seasons |
| Optional pump & panel | $55 | — | Convenience |
*Assumes watering eight 4′ × 8′ beds (~70 gal/week) during 20-week growing season at $0.015/gal.
By year four my barrels had paid for themselves twice over—and that’s in a region with moderate water prices. Drought-prone locales see even faster returns.
12. Final Reflections
Installing a rain-barrel system is the kind of project that pays off in layers. First comes the immediate satisfaction of hearing a thunderstorm drumming on the roof and knowing that bounty is flowing into your personal reservoir. Next is the quiet pride each time you tip a watering can over basil, guilt-free and chloramine-free. Finally, there’s the ripple effect: neighbors notice, ask questions, and soon another blue drum pops up two houses down. Small, practical acts spread.
If you’ve hesitated because plumbing sounds intimidating, remember that this build is glorified Lego: a few holes, threaded fittings, and gravity. No solder, no permits (usually), no weekend lost to concrete or carpentry. You can knock it out on a Saturday morning, spend Sunday admiring the setup, and greet the next rainfall like a kid waiting for coins in a fountain.
So grab a barrel, raise it high, and let the clouds top up your garden wallet. Your plants—and your water bill—will thank you.