
Why I Ditched the Plastic
Three winters ago, I wrapped my cedar beds in shiny greenhouse plastic, smugly certain the soil would stay “toasty.” By March the plastic was in tatters, the wind having shredded it like tissue, and I’d unknowingly trapped moisture that turned my rich loam into a slimy funk. Worst of all, micro‑plastic flecks glittered in the mulch like confetti.
That spring I swore off plastic covers forever. Since then—using nothing but compost, leaves, burlap, and a dash of clever timing—my raised beds wake up fluffy, worm‑filled, and weed‑free. Below is the exact playbook I follow each autumn, distilled into nine actionable steps. Ready to tuck your garden in naturally for its long winter nap? Let’s roll up our sleeves.
Table of Contents
- See Winter as Soil Rehab Season
- Step 1 – Clear, Clean, and Categorize
- Step 2 – Test & Amend While It’s Easy
- Step 3 – Layer a Compost “Blanket”
- Step 4 – Plant a Living Duvet (Cover Crops)
- Step 5 – Mulch Deeply—Without Plastic Sheets
- Step 6 – Insulate Perennials the Eco Way
- Step 7 – Secure Natural Row Covers
- Step 8 – Manage Winter Moisture & Pests
- Step 9 – Map Your Spring Wake‑Up Plan
- FAQs
- Closing Thoughts
See Winter as Soil Rehab Season
Gardenary’s mantra—“Set your garden up so success is all but guaranteed”—applies double in winter. Your beds are resting, but microbes, earthworms, and freeze‑thaw cycles are busy aerating and restructuring soil. Our job is simple: feed the biology and buffer temperature swings without sealing beds inside plastic cocoons.
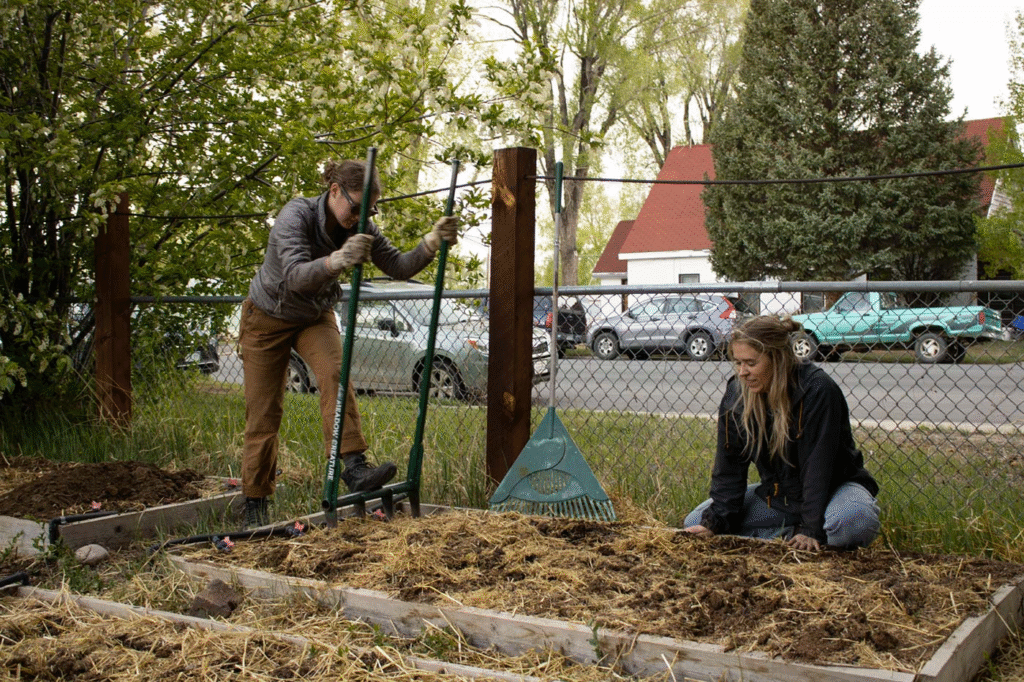
Step 1 – Clear, Clean, and Categorize
1. Pull Spent Annuals (Compost the Healthy, Trash the Diseased)
- Tug out tomato vines, bean stalks, and zuke monsters by the roots.
- Brown‑spot leaves? Powdery‑mildew stems? Bag them—do not compost. Diseases overwinter.
2. Trim—but Don’t Yank—Perennial Crowns
Asparagus fronds and herb woody bases store energy for spring. Cut stems to 4 inches; leave roots intact.
3. Sort Stakes, Labels, Drip Lines
Nothing invites spring chaos like frozen plastic tags fused to soil. Rinse and store them now, and Future‑You will send gratitude vibes in April.
Step 2 – Test & Amend While It’s Easy
Late fall is the quiet window when the soil lab isn’t swamped. Pull a 6‑inch core sample from each bed, mix, and mail it off. Typical results come back within a week:
- pH low? Sprinkle agricultural lime per lab rate.
- Potassium shortfall? Wood ash from the fire pit adds K and a touch of micronutrients (no charcoal briquette ash—chemicals!).
- Organic matter below 5 %? Cue Step 3’s compost blanket.
Your amendments need winter’s freeze‑thaw churn to integrate, so earlier is better.
Step 3 – Layer a Compost “Blanket”
Goal: 2–3 inches of finished compost spread top‑dress style—no digging.
Why top‑dressing rocks:
- Protects soil aggregates from pounding rain.
- Feeds microbes slowly; nutrients won’t leach when roots are dormant.
- Acts as the first insulation layer.
Use screened, finished compost—no visible banana peels or it’ll tempt winter scavengers.
Step 4 – Plant a Living Duvet (Cover Crops)
Skip plastic tarps; sow a green winter quilt instead. Choose based on zone:
| Zone | Fast Cover Crop | Added Perk |
|---|---|---|
| 3–6 | Winter rye | Roots drill deep, breaking compaction |
| 7–8 | Hairy vetch | Fixes nitrogen, gorgeous purple bloom |
| 9–10 | Buckwheat (fall) then crimson clover | Smothers weeds, feeds pollinators early |
Broadcast seed over the compost blanket, rake lightly, and water once. By frost you’ll see a baby carpet that holds soil all winter. Come spring, chop and drop before seed‑set; the greens become instant mulch.
Step 5 – Mulch Deeply—Without Plastic Sheets
Plastic “weed block” traps moisture, blocks oxygen, and adds micro‑plastics. Go old‑school instead:
- Leaf Mold + Straw Duo
- 2 in. shredded leaves (carbon‑rich)
- 2 in. clean straw (insulation)
- Wood Chip Topper (optional)
- 1 in. ramial wood chips if you love the tidy look. Chips also stop straw from blowing.
Aim for a 4‑inch total. Yes, that’s thick. The combo insulates like a duvet yet breathes, and spring earthworms will pull bits into the soil—free tillage!
Step 6 – Insulate Perennials the Eco Way
Some raised beds host rosemary “trees,” strawberries, or garlic cloves planted in October. Protect these VIPs minus plastic:
- Burlap sacks folded twice over crowns = breathable shield.
- Cardboard collars around tender stems fend off freeze crusts.
- Evergreen boughs laid atop beds act like a snow‑catching blanket; remove in March.
Remember, we’re buffering, not suffocating.
Step 7 – Secure Natural Row Covers
If you live where winter dips below 10 °F (‑12 °C) and still want late spinach, swap poly sheeting for:
| Cover | Material | Life Span | Notes |
|---|---|---|---|
| Frost cloth (Agribon‑19) | Spun‑bonded polypropylene | 2–3 seasons | Biodegrades slowly, no micro‑plastics |
| Old bed sheets | Cotton | Free | Double layer on extreme nights |
| Glass or polycarbonate cloches | Rigid | Decade+ | Up‑front cost, but zero waste |
Use flexible EMT conduit hoops screwed to bed walls, drape cloth, and secure with spring clamps. Air circulates; plants bask.
Step 8 – Manage Winter Moisture & Pests
Water Wisely
Dry roots kill as fast as frozen ones. If winter is arid, deep‑water on a 40 °F afternoon, then re‑cover. Beds under eaves may never catch rain—check soil monthly.
Rodent Patrol
Mulch equals hideouts. Bury ¼″ hardware cloth 6 in. deep around bed edges if voles or rats are regulars. Avoid poison—it migrates up the food chain.
Snow as Insulation
A 6‑inch snow layer insulates better than straw. Brush heavy snow off hoops to prevent collapse, but leave it to blanket mulch.
Step 9 – Map Your Spring Wake‑Up Plan
Write April love notes to yourself:
- Terminate cover crop once shoots hit 6 in. or before seed heads form. Chop, drop, and let decompose one week.
- Pull back mulch in squares where you’ll seed carrots—soil must warm to 50 °F.
- Side‑dress compost around overwintered garlic and onions.
- Inventory stakes & trellises now, not when transplants languish on the porch.
A little March planning keeps you out of big‑box chaos in May.
Frequently Asked Questions
Doesn’t plastic warm soil better?
True, clear poly can boost soil temp by a few degrees, but the gains often wash out if you can’t vent excess humid heat on sunny winter days. Organic mulch + cover crop delivers steadier temps and feeds biology.
Won’t leaves invite slugs?
Slugs slow down below 50 °F. In early spring, sprinkle crushed eggshells or diatomaceous earth around tender starts until the leaf mold breaks down.
Can I skip the soil test?
Sure—but you’ll guess on amendments and risk spring nutrient surprises. Tests cost the same as a bag of fertilizer and save mis‑applications.
What if a polar vortex hits?
Double your frost cloth layers or add cardboard sheets under burlap for 48 hours. Remove once temps rebound.
Closing Thoughts
Winterizing raised garden beds without plastic isn’t just eco‑friendly—it’s easier once you get the rhythm:
- Clean the canvas.
- Feed the soil.
- Tuck it in with living and leafy blankets.
The beds spend winter quietly brewing fertility while you sip cocoa inside. Come April, pull back the mulch and inhale that earthy spring aroma—no shredded plastic, no sticky cleanup, just ready‑to‑plant perfection.
Got questions or your own plastic‑free hacks? Drop a comment—between leaf‑raking sessions and seed‑catalog dreaming, I love swapping winter‑garden notes. Here’s to healthy soil, zero waste, and garden beds that wake up happier every spring!