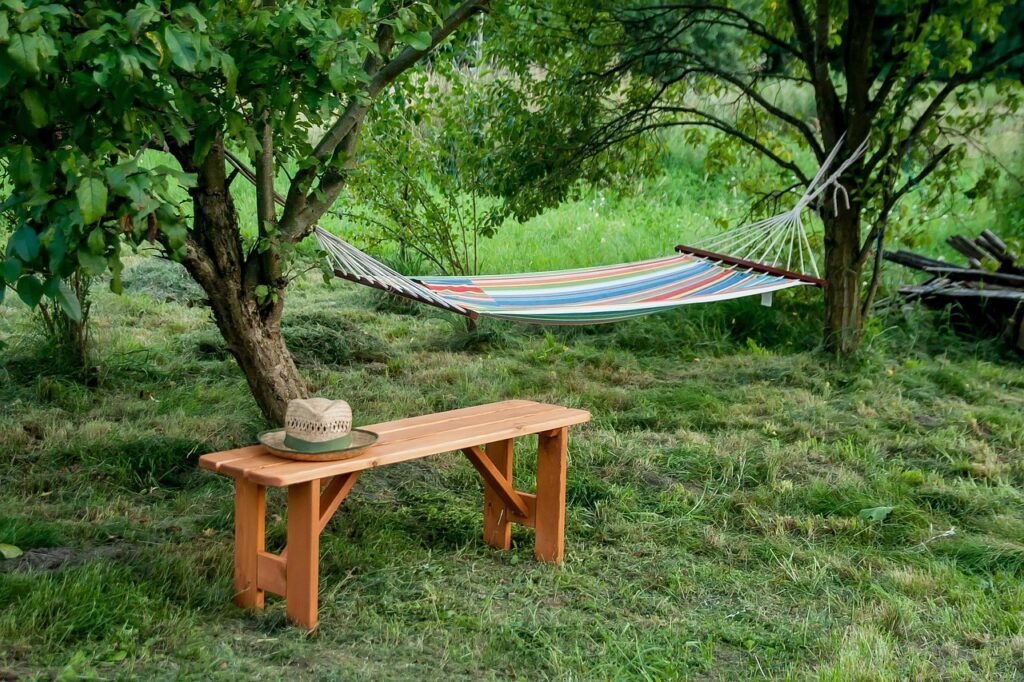
The first time I strung a slackline between our backyard maple and the neighbor’s oak, Mrs. Lopez peered over the fence like I’d parked a circus in the cul-de-sac. “You’re really going to walk on that?” she said, eyebrows trying to escape her forehead. I nodded, bounced once, and promptly launched myself into the hydrangeas. That was two summers ago. Now, the slackline is the single most-used thing in our yard—more than the grill, more than the hammock, more than the soccer net we swore would be a hit.
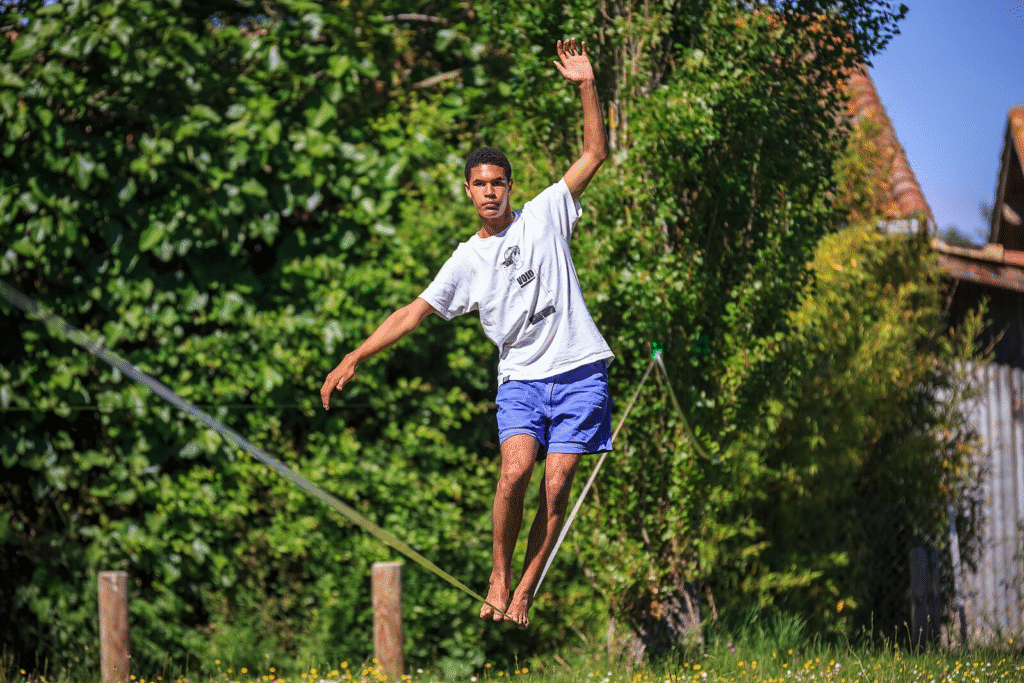
If you’ve ever watched people glide across a line and thought that’s not for me, hear me out. A backyard slackline isn’t just for gymnasts or YouTube daredevils. It’s ten feet of wobble, a portable balance beam, a kid magnet, a core workout disguised as play, and a very efficient way to get neighbors to wander over with lemonade. Here’s how to choose one, set it up without harming your trees (or yourself), and actually enjoy it—awkward first steps and all.
What a Slackline Actually Is (and Isn’t)
A slackline is a flat webbing strap tensioned between two anchors. It’s not a tightrope—there’s intentional give. That bounce is the point: your body learns to read the movement and micro-adjust.
Recommended:

There are a few flavors:
- Beginner/Backyard lines: usually 2 inches wide, ratchet tensioned, 20–50 feet long. Friendly to bare feet and brand-new legs.
- 1-inch “primitive” lines: lighter, more feel, usually tensioned with a webbing/pulley system (no big ratchet). Great as you progress.
- Tricklines/Longlines/Highlines: fantastic but not what we’re bolting to a suburban tree today. Start small.
If you’re buying your first kit, go with a 2-inch ratchet line that includes tree protection. It’s the least fussy way to get moving.
Tree Safety Comes First (Yours and the Trees’)
I’m as fond of my maples as my slackline, so tree protection is non-negotiable. The two rules:
- Healthy, wide trunks. Look for mature trees with a trunk diameter of at least 12 inches (wider is better). Skip anything with visible disease or flaky bark that sheds easily.
- Use padding. Wrap thick felt pads, purpose-made tree protectors, or even folded carpet remnants around the bark before you sling the anchor. Padding spreads the load and prevents abrasion.
Don’t screw into trees, don’t loop straps over tiny saplings, and don’t leave a line up all season in the same spot. I rotate the anchor height a foot up or down every few sessions and give the trees rest days like any athlete.
No trees? You’ve got options:
- A-frame stands (wooden) with ground stakes.
- Posts set in concrete (think fence posts, but beefier).
- Portable base systems sold with some kits.
They’re more work up front, less worry about bark.
How Long, How High, How Tight?
The internet loves formulas; my backyard loves simple cues:
- Length: Start at 20–30 feet between anchors. Shorter = easier because there’s less bounce to wrangle.
- Height: Aim so the lowest point of the line sits about mid-thigh when you’re standing next to it. That usually means anchoring around chest height depending on sag.
- Tension: New folks love cranking the line guitar-string tight. Don’t. Slight sag is kinder on gear and bodies and teaches balance faster. If your feet feel like they’re on a trampoline at 20 feet, add one or two ratchet clicks—no more.
Bonus steadiness hack: put a half-twist in the webbing before you tension it. It reduces that side-to-side “hula hoop” wobble beginners fight.
Setting It Up (Ratchet Version, Step by Step)
- Wrap tree protection around both trunks at roughly chest height.
- Anchor strap 1: Wrap the looped end around Tree A, thread the line through the loop (a girth hitch), and snug it down over the padding.
- Walk the line to Tree B without twisting it (unless you’re adding that half-twist on purpose).
- Anchor ratchet side: Wrap the ratchet strap around Tree B, thread through its loop, and click it snug.
- Thread the webbing into the ratchet: From the bottom slot up, pull through 2–3 feet. Keep the strap lying flat.
- Tension: Pump the handle slowly. Stop when you have moderate sag. Lock the ratchet and check that everything’s centered on the padding.
- Backup: Clip a short safety sling around the closed ratchet gate if you’re cautious (I am). It’s cheap insurance.
To release, flip the ratchet’s safety, open it fully, and slide the webbing out with a firm grip so it doesn’t whip. Keep kids and pets clear during tensioning and release.
First Steps: The “Don’t Faceplant” Lesson Plan
My first successful crossing took a week. These drills shaved days off for everyone after me:
- Mount from the side, not from the end. Put your lead foot on the line, stand up slowly, and bring the trailing foot to meet it. Standing is the win, not walking.
- Eyes on the anchor, not your feet. Looking down invites wobble brain.
- Arms like zombie antennas. Elbows high, wrists loose. You’re steering from the hips and ankles; arms are just counterweights.
- Breathe and “freeze.” Step, stop, inhale, exhale, then move again. Pausing resets the wobble.
- Find your foot. Most people balance better with feet slightly turned out—or fully parallel. Test both.
- Learn to fall. Step off forward with a soft knee bend. Never “catch” the line behind your calf or hook it with a toe—classic recipe for a flip.
Ten minutes a day beats a single weekend marathon. Your nervous system learns between sessions.
Games That Trick You Into Getting Better
For kids (and, frankly, adults):
- Red Light, Green Light: Caller freezes walkers mid-step—great for micro-adjustments.
- Beanbag Pass: Start by standing on the line, tossing a beanbag to a friend. Add steps as you steady.
- Water Cup Challenge: Walk with a half-full cup. Spills are hilarious and self-correcting.
- “Island Hops”: Lay two small towels on the line (instant “islands”). Step, freeze, step. This demystifies foot placement.
We keep a little “slackline belt”—a thrift-store karate belt—for beginners to hold while a spotter walks beside them. It’s a magic confidence rope.
Upgrades and Variations Once You’re Hooked
- 1-inch line, primitive style. Lighter, more “rope-y” feel, easier to pack for camping. You’ll learn a basic pulley system and feel smug about it.
- Longer lines. Add five feet every week. Past 35–40 feet, you’ll rediscover humility and your core will send you thank-you notes.
- Surfing/bouncing. Soft bounces with bent knees, gentle “surf” side-to-side. Keep height low and the area clear.
- Slackline yoga. Tree to tree sun salutations—yes, it’s a thing, and no, you won’t look ridiculous. Or you will, and that’s fine.
Safety You’ll Be Glad You Read
- Clear the fall zone. No garden stakes, fire pits, or toys under or near the line. Grass is nice; a crash pad is nicer.
- Low is your friend. Keep the line low enough that stepping off is natural—not a leap.
- Inspect gear. Before each session, check webbing for cuts, ratchet teeth for burrs, and slings for fraying.
- Respect the trees. Use wide padding, move anchor spots, and take rest days.
- No alcohol while learning. I know. But trust me on this one.
Troubleshooting the Wobbles (Literal and Figurative)
- “It’s too shaky to stand!” Shorten the line or add a click of tension. Try the half-twist. Stand with both feet together for 10-second holds.
- “My feet hurt.” Barefoot is great, but grippy minimalist shoes can help on hot/cold days or sensitive arches.
- “I drift to one side.” Everyone has a dominant hip. Face the other direction and see if it evens out. Also check that your anchors are level.
- “The ratchet screams when I tension.” A drop of light oil on the axle and teeth every few sessions keeps it civilized.
Weather, Seasons, and Storage
Slacklining in morning shade feels ten degrees cooler. If the strap’s too hot to touch, so are your feet. After rain, I towel the line once and give it an extra ratchet click (wet webbing stretches more). Winter? I still walk short lines on crisp days; just stash the ratchet indoors to avoid rust, and never tension on icy bark.
I don’t leave the line up for months. UV eats everything eventually, and it’s better for the trees to breathe. My routine: up for the weekend, down on Sunday night. Fifteen minutes either way.
What It Costs (and What You Actually Need)
You can spend as little as $45–$60 for a simple 2-inch kit with ratchet and padding. That’s plenty to start. If you want to get fancy later:
- Extra tree protectors: $15
- A second line (1-inch): $40–$70
- Crash pad or foam tiles: $30–$80
- A-frame stands or ground anchors: variable, DIYable if you’re handy
I love nice gear, but my most-used setup is still the beginner kit we bought on a whim—plus two squares of carpet leftover from the basement remodel.
Slackline vs. Backyard Gym (Why This Sticks)
I’ve owned resistance bands, a pull-up bar, and one of those wobble-board things that now lives under a bed. The slackline’s different because it’s social. Someone wanders over every time it’s up. My dad tried it at 67 and now does ten-second stands he brags about like they’re marathon medals. The kids invented a scoring system (style points for dramatic saves). Even Mrs. Lopez shuffles across now and then, pretending not to grin.
The sneaky benefit: balance turns you into a better version of yourself in other places. I don’t trip running trails. My ankles handle uneven garden beds. Carrying groceries across icy steps last winter felt less like a gamble.
A One-Afternoon Plan (If You Want to Start Today)
- Pick two healthy trees 20–30 feet apart. Check for solid bark, no rot.
- Buy a beginners’ kit with tree protectors and a 2-inch line.
- Set the line so the low point is mid-thigh. Add a half-twist before tensioning if you’re nervous about wobble.
- Clear the zone of furniture, bricks, and garden tools.
- Warm up with ankle circles and a few squats.
- Practice standing for one minute total: step up, freeze, step off. Repeat ten times.
- Add three steps: up, two steps, step down. Keep the victories tiny and celebratory.
- End while you’re still having fun. Tomorrow will be easier.
Neighbor Diplomacy and Backyard Etiquette
Slacklines attract attention. I’ve learned to keep a spare set of tree pads and let visiting kids (and curious adults) take a turn with spotters on either side. I also release the ratchet after sundown; metal cooling makes small pings, and there’s no need to soundtrack the neighborhood with ping-ping-ping at 2 a.m.
If your HOA is twitchy about “structures,” frame it as temporary exercise equipment. Worst case, you’ll become the person who brings a portable line to block parties, which is not a bad identity.
Why I Keep Coming Back
Some evenings I walk the line barefoot with a mug of tea and a podcast, sunset hitting the maple leaves like stained glass. Other times it’s chaotic: kids racing, dog barking, a chorus of “Watch this!” Either way, ten minutes in, my shoulders drop and my brain shuts up in the best possible way. Balancing demands your full attention. It’s moving meditation with the occasional comic wipeout.
If you’re slackline-curious, let this be your nudge. Start short, start low, be kind to your trees, and laugh at the flails. The learning curve is steeper than a hammock and flatter than a unicycle, which feels like the sweet spot for a backyard hobby. And when your neighbor finally asks “Okay, can I try?”—just smile, hold out a hand, and say, “Absolutely. Step up.”